
Guide to Creating Electronic Briefs
for the Connecticut
Supreme and Appellate Courts
Page |
1
2
Introduction
This guide was created to help filers provide working electronic briefs to the
Supreme and Appellate Courts in Connecticut. While there are other
products that can produce the same result, this guide focuses on Word (2007, 2010
and 2013) and Adobe Acrobat. Some of these steps may be similar in other
programs.
Be sure to check the guidelines provided for the optional EBriefing program to make
sure you have met all the requirements and rules for appellate briefs.
Page |

3
I. Creating Electronic Appellate
Briefs
A. Format
Check with the court’s website to ensure that you meet the requirements or
guidelines for formatting.
B. Tools
Word processor
The primary tool for creating an electronic brief is your word processor. Microsoft
Word provides some helpful features that make creating an electronic document
easier. In particular, Word’s Styles feature (see Generating Bookmarks below) allows
you to create headings in your brief that will automatically create bookmarks when
you convert the document as a PDF.
Adobe Acrobat Pro
Adobe Acrobat sets the standard for creating, combining, editing, redacting and
making PDFs searchable. Eventually you will need to do all of these things if you are
working with electronic documents. There are other less expensive PDF software
programs, but you will find a variety of resources to assist you with Adobe Acrobat.
For example, Adobe hosts a free Acrobat for Legal Professionals Blog that provides
tips and techniques for working with electronic legal documents.
C. Basic Steps
1. Save or convert your document from the original word
processing document, such as Word, directly to PDF (do not
scan the document to create a PDF).
2. Create bookmarks
1
from the Table of Contents.
3. Redact any information that must be redacted under the rules.
(See Redacting.)
4. Make text-searchable.
You can skip step 3 above if your document does not contain any information that
must be redacted.
1
Bookmarks are a fast and easy way to quickly navigate to different parts of a document and are
required for the optional EBriefing program.
Page |
4
D. Pagination
Before saving/converting the document as a PDF, make sure to number the pages
consecutively beginning with the cover page of the document, using only the Arabic
numbering system, as in 1, 2, 3, with a number on every page. Do not use a separate
pagination system for tables within the document and the page number does not need
to appear on the cover page and can be suppressed.
1. Saving/Converting directly to PDF
Word 2007 (without Adobe Acrobat Pro installed)
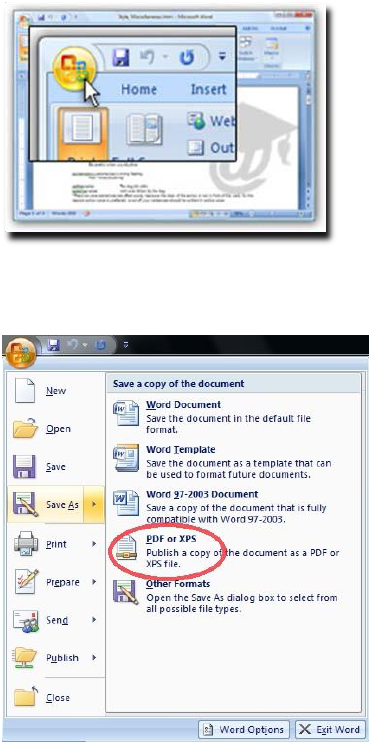
Click the Microsoft Office Button in the top left hand corner of Word.
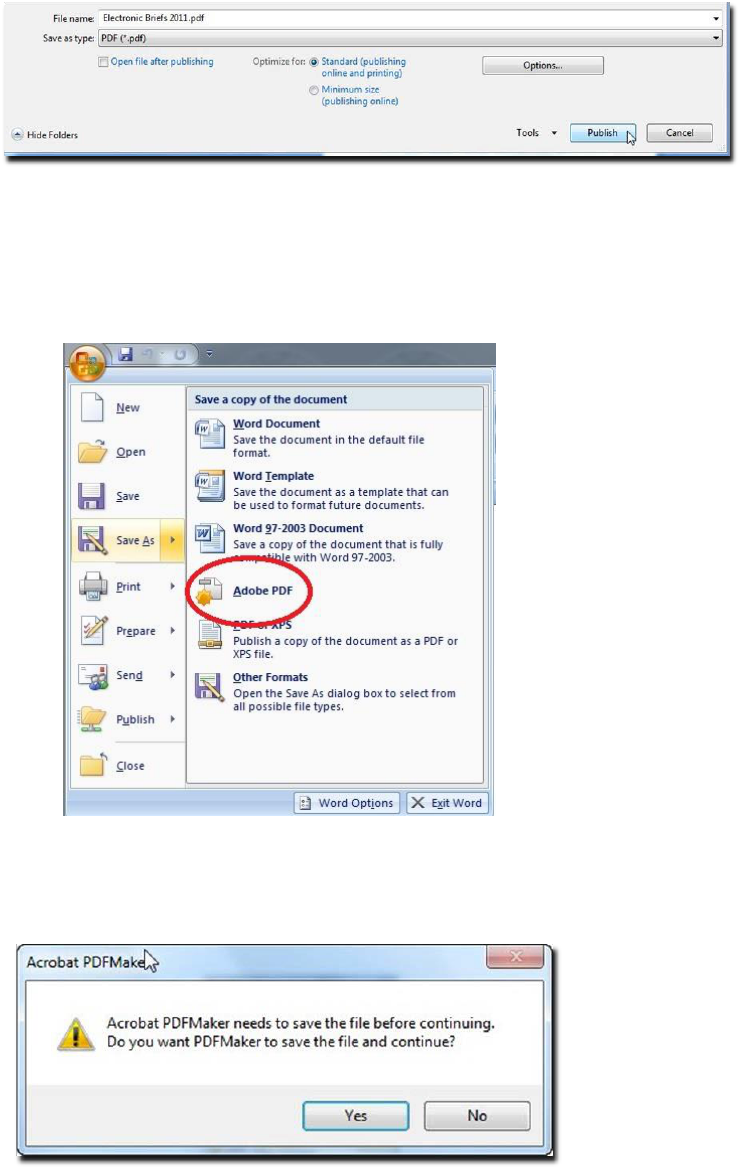
Choose Save As and PDF or XPS (see below).
Page |
5
In the dialog box that appears, click the button in the lower right hand
corner that says Publish.
Word 2007 (with Adobe Acrobat Pro installed)
Choose Save As and Adobe PDF (see below).
When the box below appears, choose Yes.
Page |
6
Word 2010 and 2013
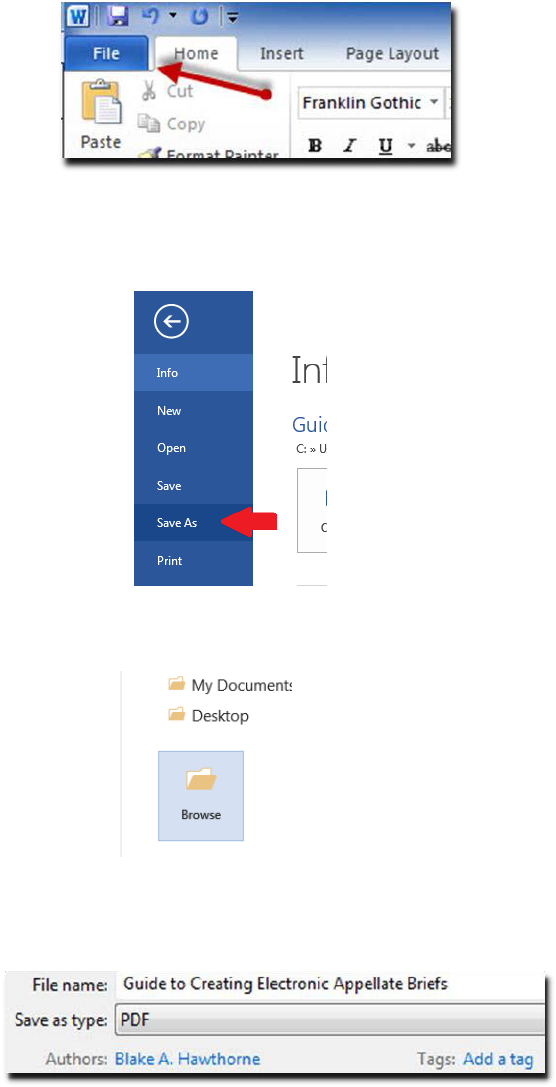
Click on the File tab.
Choose Save As.
Click Browse
In the dialog box that appears, choose the Save as type = PDF.
Click Save.
Page |
7
Adobe Acrobat Ribbon in Word
When you install Adobe Acrobat, the installer may add Acrobat buttons or menu
commands to Microsoft Office applications (e.g., Word, Excel, PowerPoint).
The advantage of using the Acrobat Ribbon to create PDF from Word is that it will
automatically create bookmarks for your document if you have used Word’s Styles
feature.
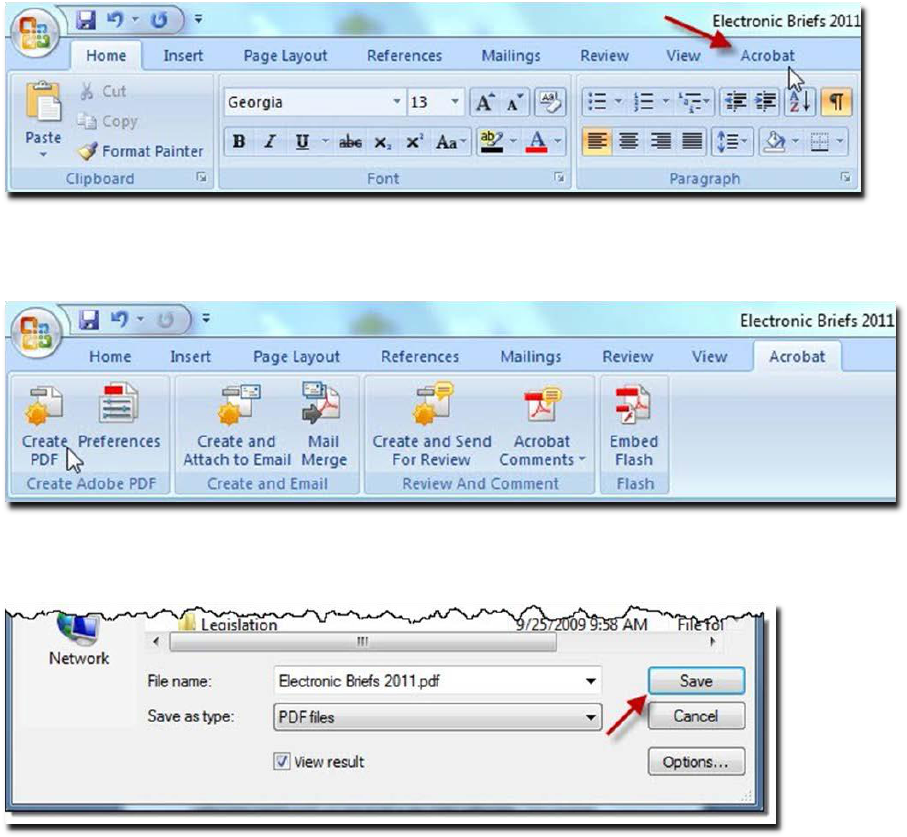
Choose Acrobat at the top of the screen (to the right of View).
Click Create PDF in the menu.
In the dialog box that appears, click Save.
Page |
8
When printing a hard-copy of a document, be sure to use the PDF file
to insure that the print exactly replicates the e-file version. Pagination
and sentence structure may change when converting a document to a
PDF.
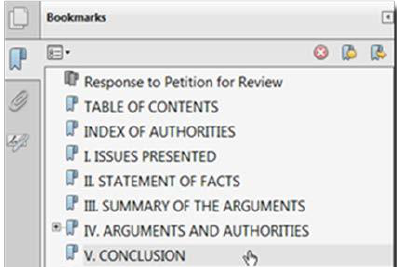
2. Create bookmarks
A bookmark is a te
xt link that appears in the Bookmarks Panel of Adobe Reader
and Adobe Acrobat. Re
aders can use the bookmarks to quickly navigate to different
se
ctions of a document. Make sure to include bookmarks in all electronic documents
and be sure to use descriptive labe
ls for your bookmarks (e.g. Trial Court Judgment,
Appellate Court Opinion) as illustrated be
low.
Clicking on the Bookmarks Icon (left
side of screen) opens the Bookmarks
Panel revealing the list of bookmarks,
as in this illustration.
Bookmark settings
While the document is open, click File > Properties > Initial View tab
Click the Navigation tab dropdown and select Bookmarks Panel and Page
Click OK
Also, make sure to set the zoom settings in the bookmarks to make sure the
bookmark view is always the same. See Adobe PDF Bookmark Zoom Settings.
Generating bookmarks
If you use the paragraph styles available in Word to label the headings in your
document, whe
n you use the built-in Acrobat ribbon to generate your PDF, your
document will already include bookmarks to the headings in yo
ur document.
Page |
To maximize the impact of your document, set the bookmarks to open automatically.
This setting is only available in Acrobat Pro, not in Adobe Reader.
9
A tutorial on Word’s Styles feature is beyond the scope of these instructions, but
Microsoft provides a tutorial on the web. Word’s Styles feature is a tremendous time
saver for generating bookmarks, the table of contents, and formatting your document.
Manually adding bookmarks
To manually add a bookmark, in Adobe Acrobat, follow these steps:
1. Click on the page where you want to create a bookmark
2. Click the New Bookmark Icon in the Bookmarks Panel or select CTRL and B
keys on your keyboard at the same time.
3. In the text of the new bookmark, type the name or label that you want to give
the bookmark.
OR
Highlight the text on the page you want to bookmark, then press the CTRL
and B keys on your keyboard at the same time (or right click and select add
bookmark). The bookmark will appear in the panel and the name will be the
same as the text you highlighted.
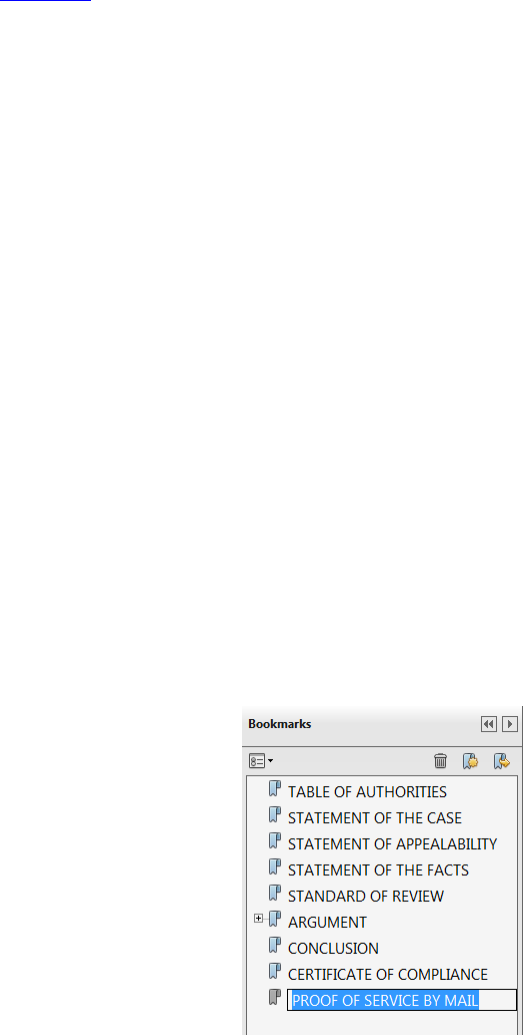
Editing bookmarks
To delete a bookmark, select the bookmark and press the delete key.
To edit the name of a bookmark,
double click on the bookmark.
Once the bookmark text is
highlighted, you can edit the text of
the bookmark. Press enter when you
are satisfied with the results.
Avoid using names like Header A,
Header B, etc. Instead, try something
like Statement of the Case,
Conclusion.
Page |

10
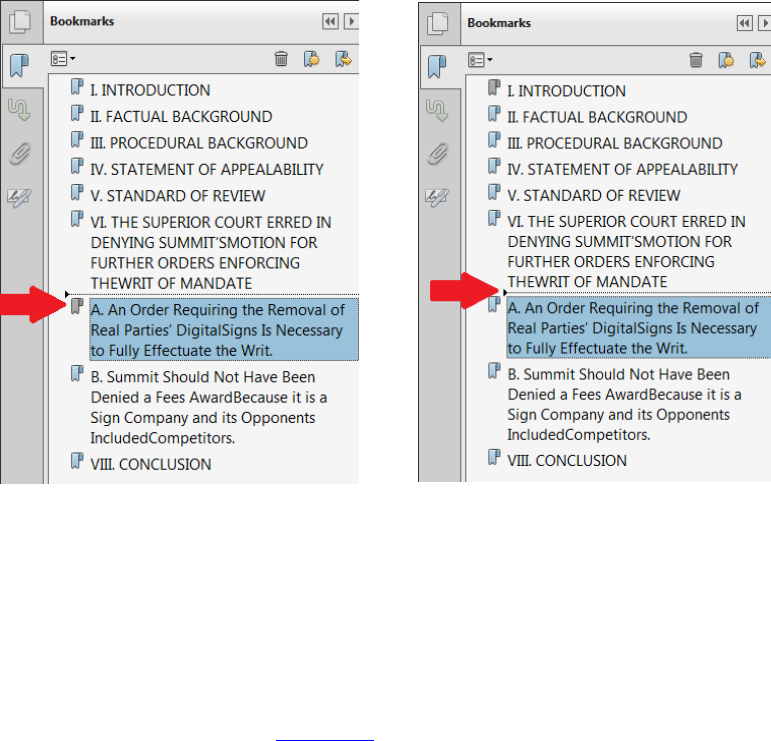
Moving bookmarks
To move bookmarks up and down in the Bookmarks Panel, left click and hold the
text and drag the bookmark to the desired location in the Bookmarks panel. Once the
arrow and dotted line are in the new location, release the left mouse button to drop the
bookmark in its new location.
Nesting bookmarks
Bookmarks can also be nested
underneath other bookmarks to create
a tiered structure of bookmarks, as in
the illustration. Clicking on the minus
sign next to the Argument and
Authorities bookmarks collapses
these bookmarks so that they are not
visible. A plus sign then appears next
to the Arguments and Authorities
bookmark, which will expand the
nested bookmarks and make them
visible again when selected.
To nest a bookmark underneath another bookmark, move the bookmark as described
above. But this time, move the bookmark up and over underneath the bookmark
where you want it nested. In other words, select the bookmark by left clicking and
holding the mouse button down. Then move it up and to the right without releasing
the mouse button. Release the mouse button once the bookmark appears to be
Page |
11
indented. Once you have the bookmarks the way you want them, be sure to save your
document in order to save your changes!
Page |
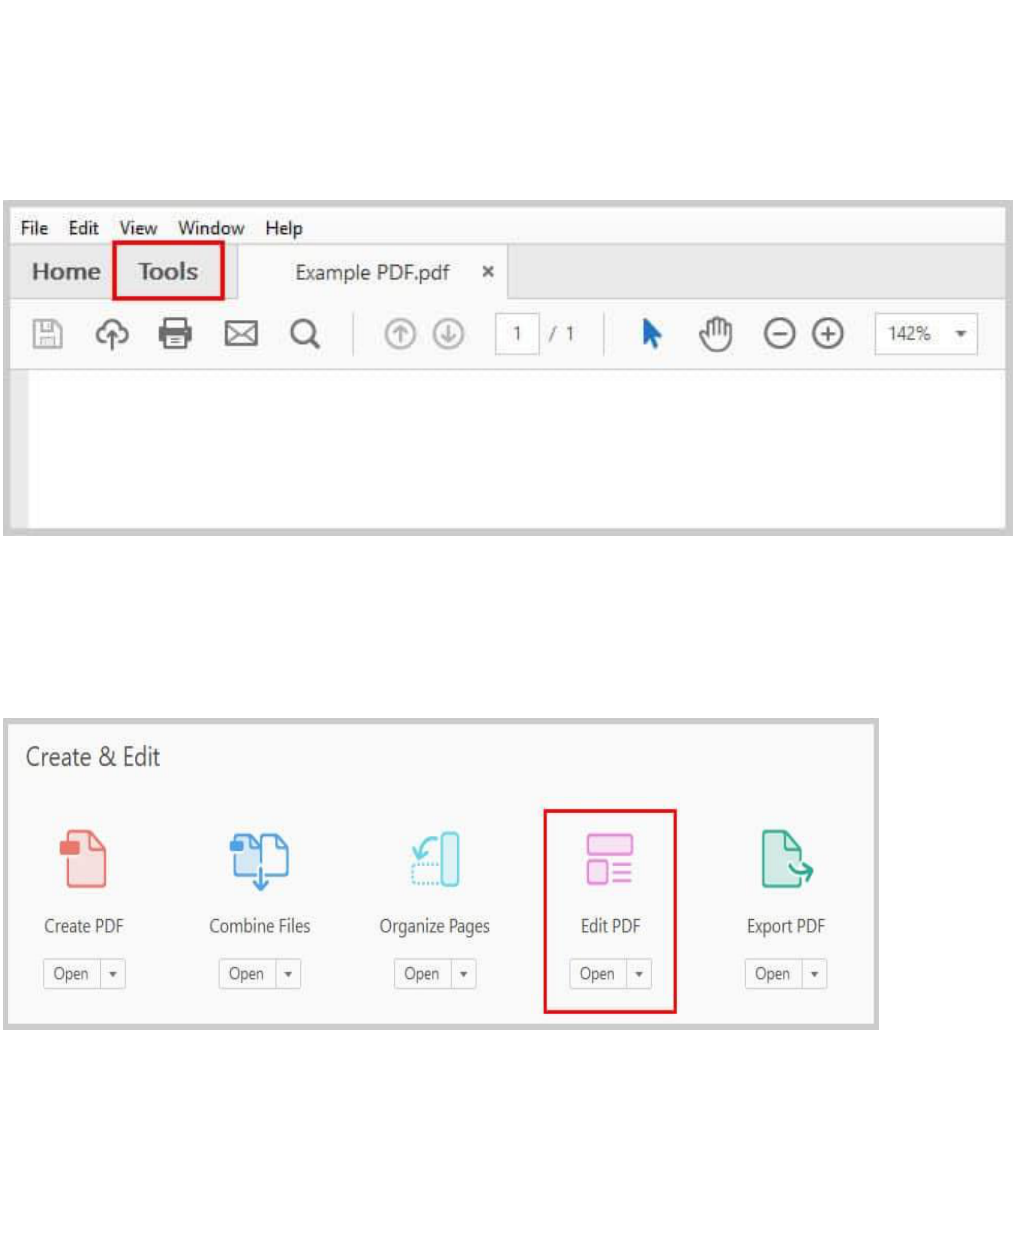
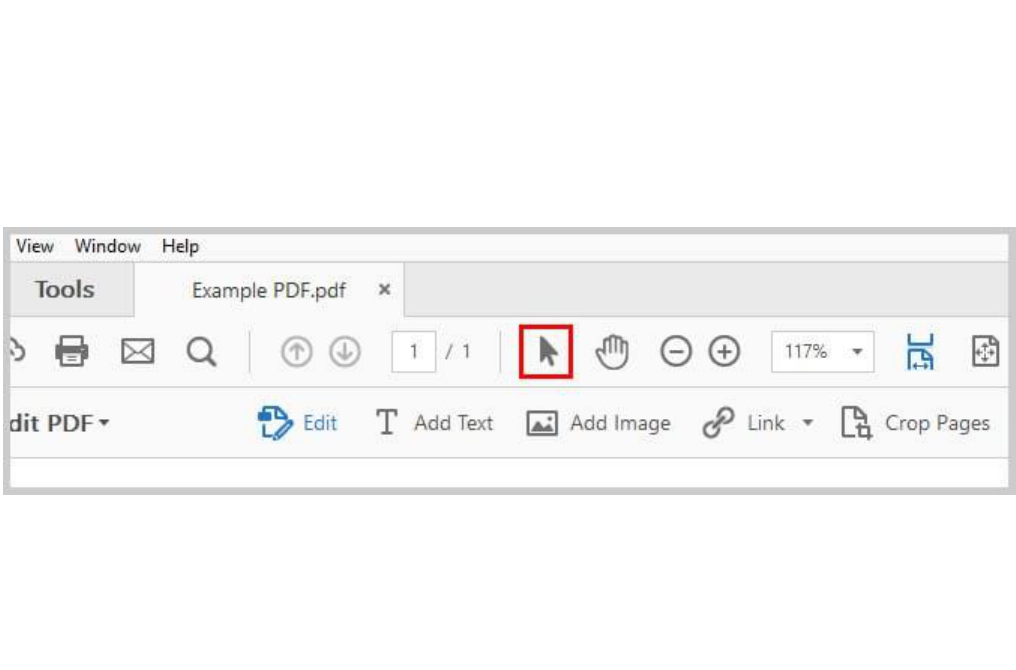
3. Create Internal Links in PDFs
1. Select the Tools tab.
2. Select the Edit PDF icon in the Tools Pane.
Page |
12
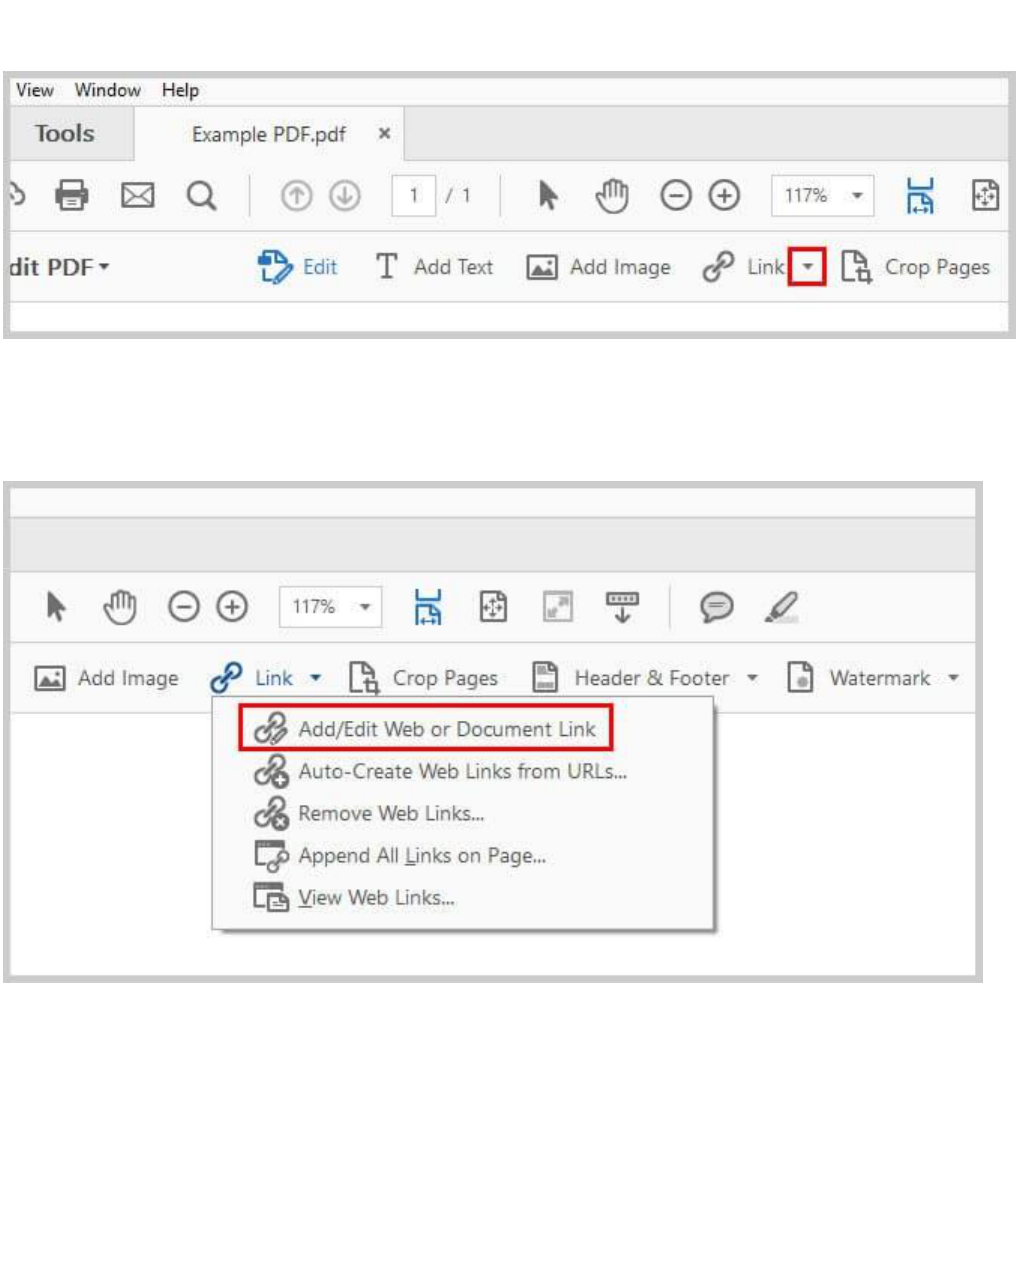
3. Select the Link down arrow in the Edit PDF toolbar.
4. Select Add/Edit Web or Document Link from the drop-down
menu.
Your selection (arrow) cursor will turn into a crosshair-style cursor.
Page |
13

5. Left-click and hold as you use the cursor to drag a rectangle
around the text you want to turn into an internal link.
6. Select Invisible Rectangle or Visible Rectangle from the Link
Type drop-down menu in the Create Link dialog box.
The invisible rectangle will be appropriate for most PDFs. If you
choose a visible rectangle, you can also select the line style,
thickness, and color from the Create Link dialog box.
Page |
14
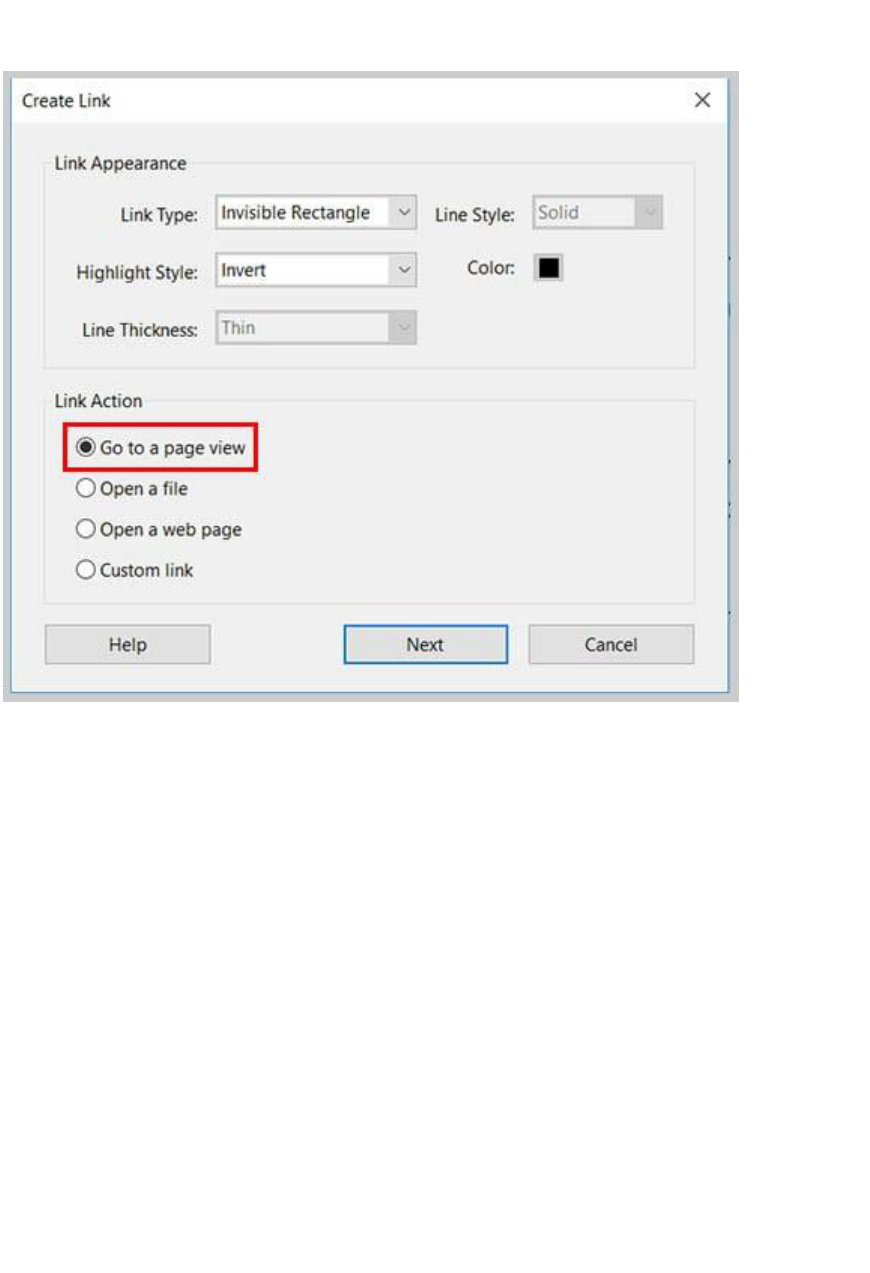
7. Select Go to a page view in the Link Action section.
Page |
15
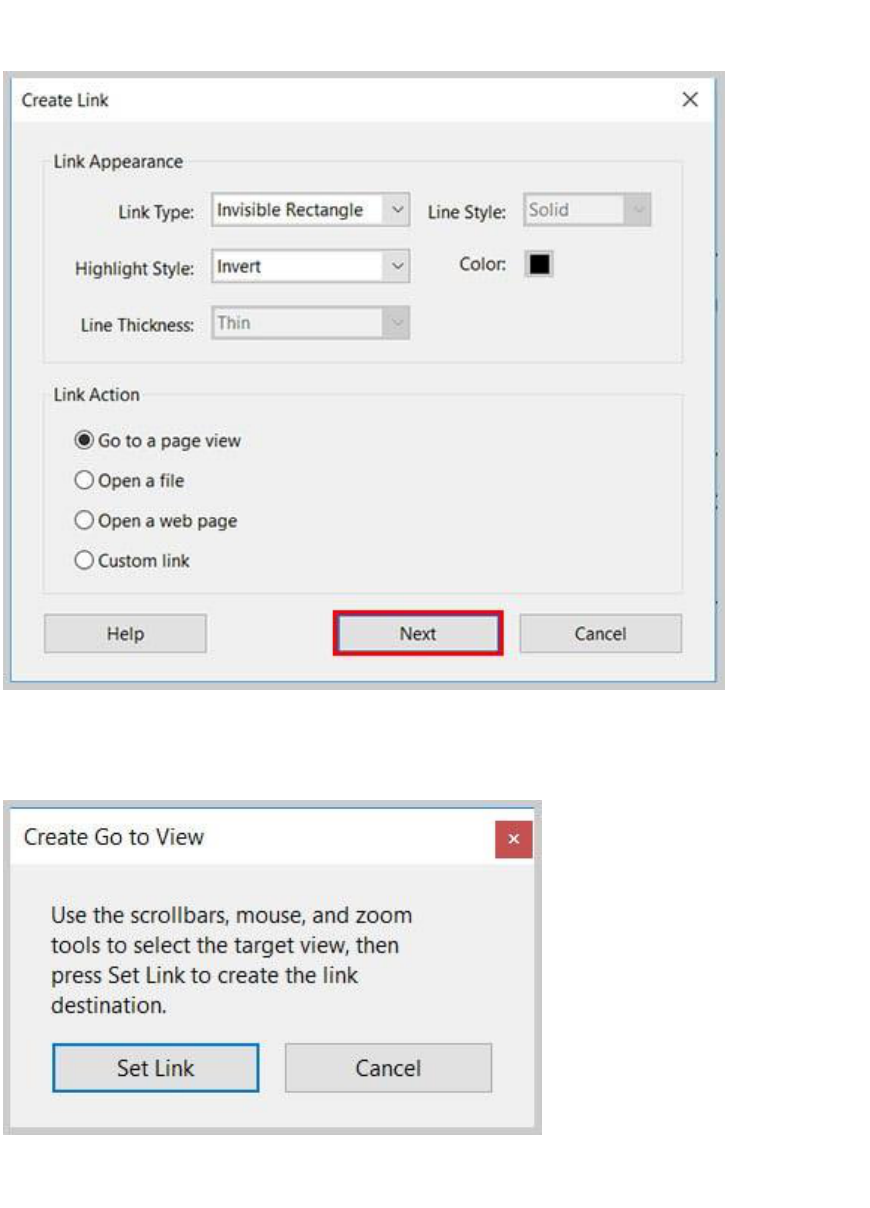
8. Select the Next button.
The Create Go to View dialog box will appear.
Page |
16
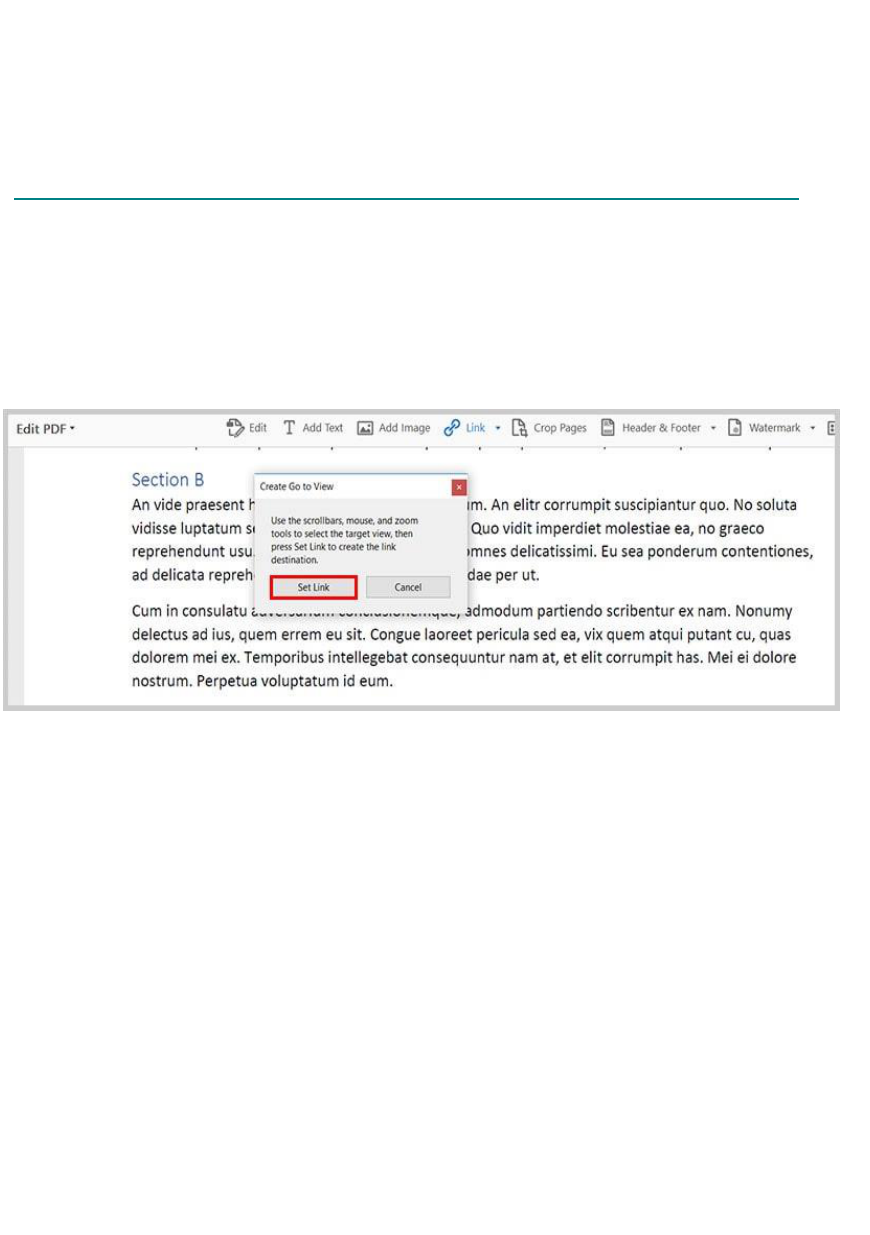
9. Scroll to the part of the document you want to link to. The Create
Go to View dialog box will remain on the screen while you scroll.
Important Note: You are creating a link to the part of the
document visible on your screen rather than to specific text. Visit
“Three Ways to Create Bookmarks in PDFs with Adobe Acrobat” if
you want to link to specific text.
10. Select the Set Link button in the Create Go to View dialog box
when the part of the document you want to link to is visible on your
screen.
After you select the Set Link button, Acrobat will return to the text
you linked to in step 5.
If you chose Invisible Rectangle in step 6, you’ll still see a rectangle
around the link you created until you close the Edit PDF toolbar.
The rectangle won’t reappear when you reopen the toolbar.
Page |
17
Optional Final Steps: Ensure Your Internal Link Is Working
Correctly
11. Select the selection (arrow) cursor. (The link you just created
won’t work until the selection cursor is chosen or the Edit PDF
toolbar is closed.)
12. Click the link to ensure it takes you to the correct location in
your document.
13. Save your document.
Page |
18
19
The most important thing to remember about redacting documents is to
permanently remove the information from the document. Do not use a black
highlighter in Adobe Acrobat to cover up the information! Highlighter marks
can be removed by anyone with Adobe Acrobat and anyone can search the text of the
document to find the text that is beneath the highlighter mark.
If you have Adobe Acrobat Pro, you can use the redaction features of the program to
redact documents electronically (see Redacting Using Adobe Acrobat Pro below).
Please note that Adobe Acrobat Standard does not have redaction features.
Redacting using Word
If you do not have Adobe Acrobat Pro, then you should edit the text of any
document that you have in the original file (e.g., a Word document) to remove the
information. Replace any characters that you remove with the letter x and then
save the edited document as a new document. Here is an example:
Original text document:
Mike Brown’s social security number is 357-57-7372. His home
address is 1510 Maple Avenue, New York, 201292. His credit
card number is 2138 2912 2938 2919.
Edited Text:
Mike Brown’s social security number is xxxxxxxxxx. His home address is
xxxx xxxxx xxxxxxx xxx xxxxx xxxxxxx. His credit card number is xxxx
xxxx xxxx xxxx.
As you can see, depending on the font you are using, editing the document in this way
may slightly alter the layout of your document. Be sure to check the page layout to see
if your page numbering has been altered. If you do not have Adobe Acrobat Pro and you
only have the documents in paper format, you will need to copy the documents, redact
them manually, and then scan the redacted documents. Please note that document
Redaction should be done before creating bookmarks and making the appendices text
searchable. The steps below will remove bookmarks and text recognition. See Practice
Book Section 47 for the types of information that must be redacted.
4. Redacting
Page |
structure and searchability may be lost unless the scanner is set to automatically
scan documents in OCR (optical character recognition) format.
20
Redacting Using Adobe Acrobat Pro
Select the text you want to redact. To select text, click the left button on the
mouse and drag it across the text using the redaction tool. You can also double
click a word to mark it for redaction.
1. Place the cursor over the word marked for redaction to preview what
the text will look like when redacted.
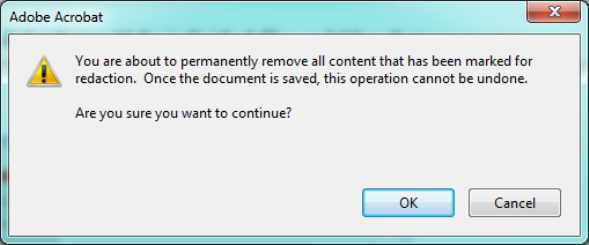
2. Once you are satisfied with the appearance, choose Apply Redactions.
This window will appear
Click OK
Page |
Click the Tools panel > Protection > Mark for Redaction.
1. Open Adobe Acrobat Pro 2017
NOTE: JavaScript must be turned off User must check to verify
that Java Script is actually disabled on the PC every time they begin a
new redaction session. If it is not turned off, there is potentially a hackable
hole in your redaction.
2. Open a “copy of the original PDF” that has been saved to the shared folder.
NOTE: While the Search function can be used to assist the redactor in
identifying appropriate text for redaction, it should never take the place of
actual human review of the document and verification that the redaction was
done thoroughly and correctly.
21
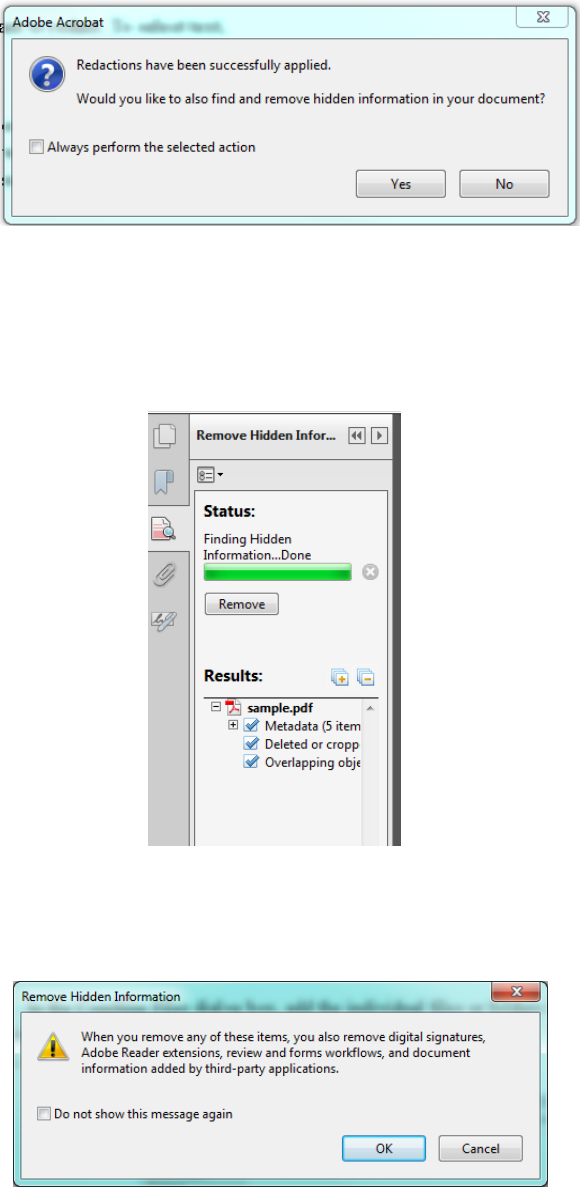
Adobe will open the panel below and find hidden information
Click Remove
When this window appears
Click OK
Save the document.
Page |
Click Yes
When this window appears

Sanitizing the document after redacting
1. Open the PDF in Acrobat DC, and then do one of the following:
Choose Tools > Redact.
On the Edit menu, choose Redact Text & Images.
The Redact toolset is displayed in the secondary toolbar.
2. Click Sanitize Document. In the Sanitize Document dialog, to remove
hidden information, click Click Here.
If items are found, they are listed in the Remove Hidden
information panel with a selected check box beside each item.
3. Make sure that the check boxes are selected only for the items that you
want to remove from the document. (See Remove Hidden Information
options.)
4. Click Remove to delete selected items from the file, and click OK.
5. Choose File > Save, and specify a filename and location. If you don’t want
to overwrite the original file, save the file with a different name, at a
different location, or both.
Page |
22

23
5. Text-searchable
All electronic documents must be text-searchable, in PDF (portable document format)
while maintaining the original document formatting. If you find your PDF is not text-
searchable, follow the instructions below.
Open the document in Adobe Acrobat Pro.
Click Tools > Text Recognition > In This File > OK
If some text has already been rendered searchable, check the box Ignore future errors
in document and click on OK. When the Text Recognition process is complete,
remember to save the document.
NOTE: If a header, e-filing stamp or bates no. has been added to a non-searchable
document, Acrobat will not OCR that page and you will receive the message below.
Page |

24
E. Fixing Mistakes in Adobe Acrobat Pro
It is not unusual to get to the end of the process of creating an electronic brief and
discover that you have made a typographical error. You may be able to fix some simple
typographical errors using Adobe Acrobat. The Edit Text tool allows you to erase and
type in a PDF as though it were a word processing document. Adobe Acrobat
automatically recognizes the font type and size, and you can backspace to remove text
and then retype.
Select Tools > Content Editing > Edit Text & Images. Then place your
cursor where you want to edit and type as you would with a word processor.
The tool has some limitations and not all fonts are available in Adobe Acrobat. If you
used an unusual font you may get the following message.
Also, the Edit Text tool cannot reflow all of the text in your document like a word
processor, so this tool cannot be used to retype sizeable portions of your brief.
F. Replacing Pages
If the mistake cannot be fixed with the Edit Text tool, you may be able to fix the
error by deleting the offending page and replacing it with a corrected page. To replace
a page, first fix the mistake in your word processing program. Then convert the
corrected word processing document to PDF. Now Extract the corrected page from
your corrected PDF and save it as a separate PDF document. Then Delete the page
with the error from your original PDF and Insert the corrected page into the proper
place in the original PDF.
Page |
25
Depen
ding on the mistake, it may just be easier to start over and recombine all your
files after fixing the error in your brief. But if you have done a lot of manual
bookmarking and hype
rlinking, replacing the page using Adobe Acrobat may be easier
than starting all ove
r again.
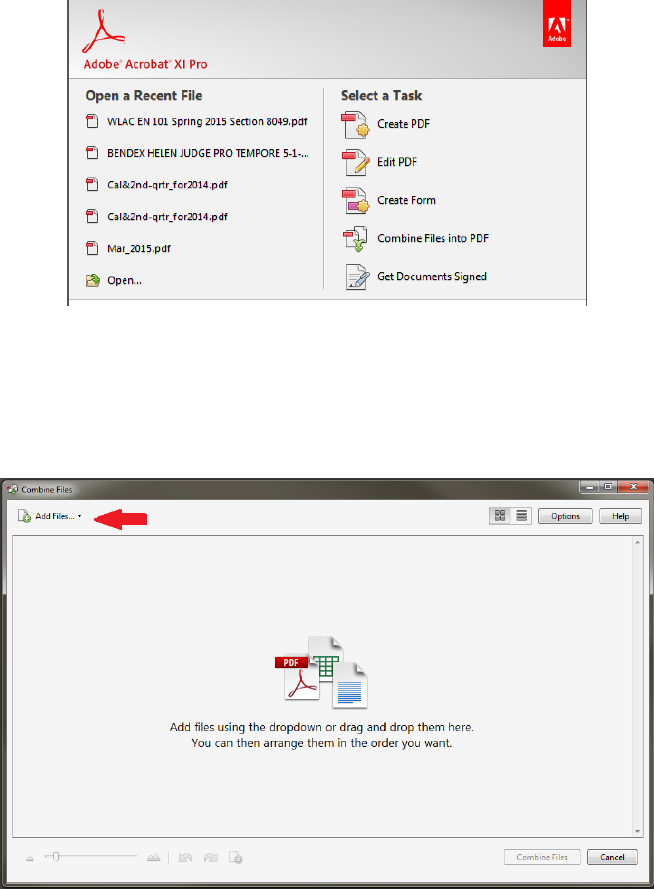
G. Combine individual files into one PDF file
To combine individual files into a single PDF document, follow these steps:
Within a document in Adobe Acrobat
Choose Create > Combine Files in to a Single PDF
Or
Page |
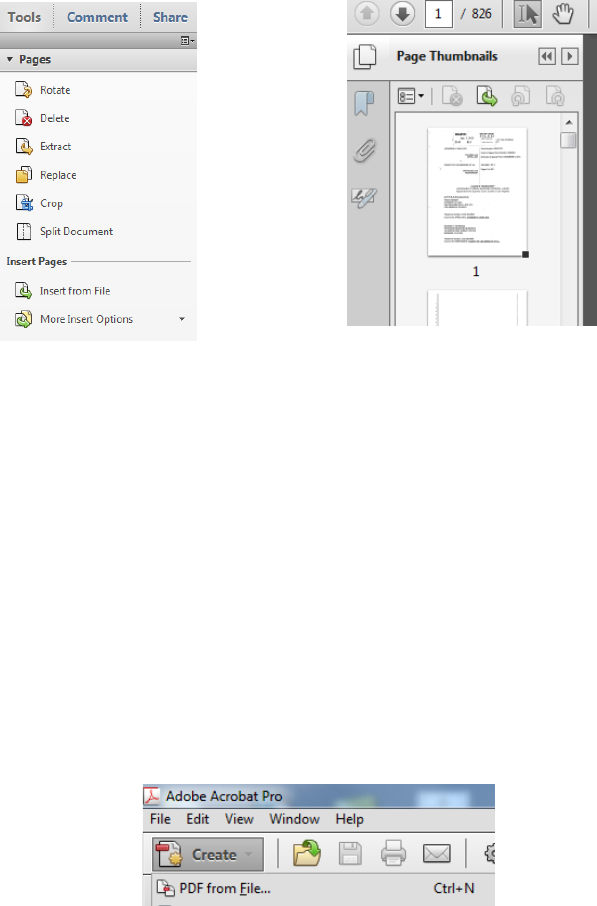
Click Tools > Pages > Extract or click the Page Thumbnail icon on the left,
right click on the page(s), select extract Pages
26
From the Main Menu in Adobe Acrobat
Choose Combine Files into PDF
In the dialog box, add the individual files or folders that you want to combine into a
single PDF. The files can be of any format supported by Adobe Acrobat (Word, PDF,
Excel, etc.).
Arrange the files in the order that you want to combine them.
Select Combine Files.
Save and name the combined document.
Page |
27
H. File Size
A single PDF file may not exceed a total of 50 megabytes in size. If a filing exceeds this
file size limitation, the EFiling system will not accept the document. Please note that
audio files and video files are not permitted.
Page |
28
Special thanks is given to the Courts of Appeal and Supreme Court
in California for sharing their Guide to Creating Electronic
Documents/Filings.
Page |
